Get Started with BrainSTEM
Table of contents
- Create Your First Project
- Add your personal attributes
- Create Your First Subject
- Create Your First Session
- Already Have Data? Import It Quickly!
- Build Your Own Experiment
- Next Steps
Create an account
First thing to do is create an account. Provide your name, email, and a secure password. Once you have created an account you can visit your profile from the top menu to add a profile image, and link to your orcid account, your google scholar profile, and your website.
Create or Join a Group
Next, you need to either create a new group for your lab or join an existing one. Groups in BrainSTEM help organize lab members and manage permissions for projects and resources.
Accessing Groups
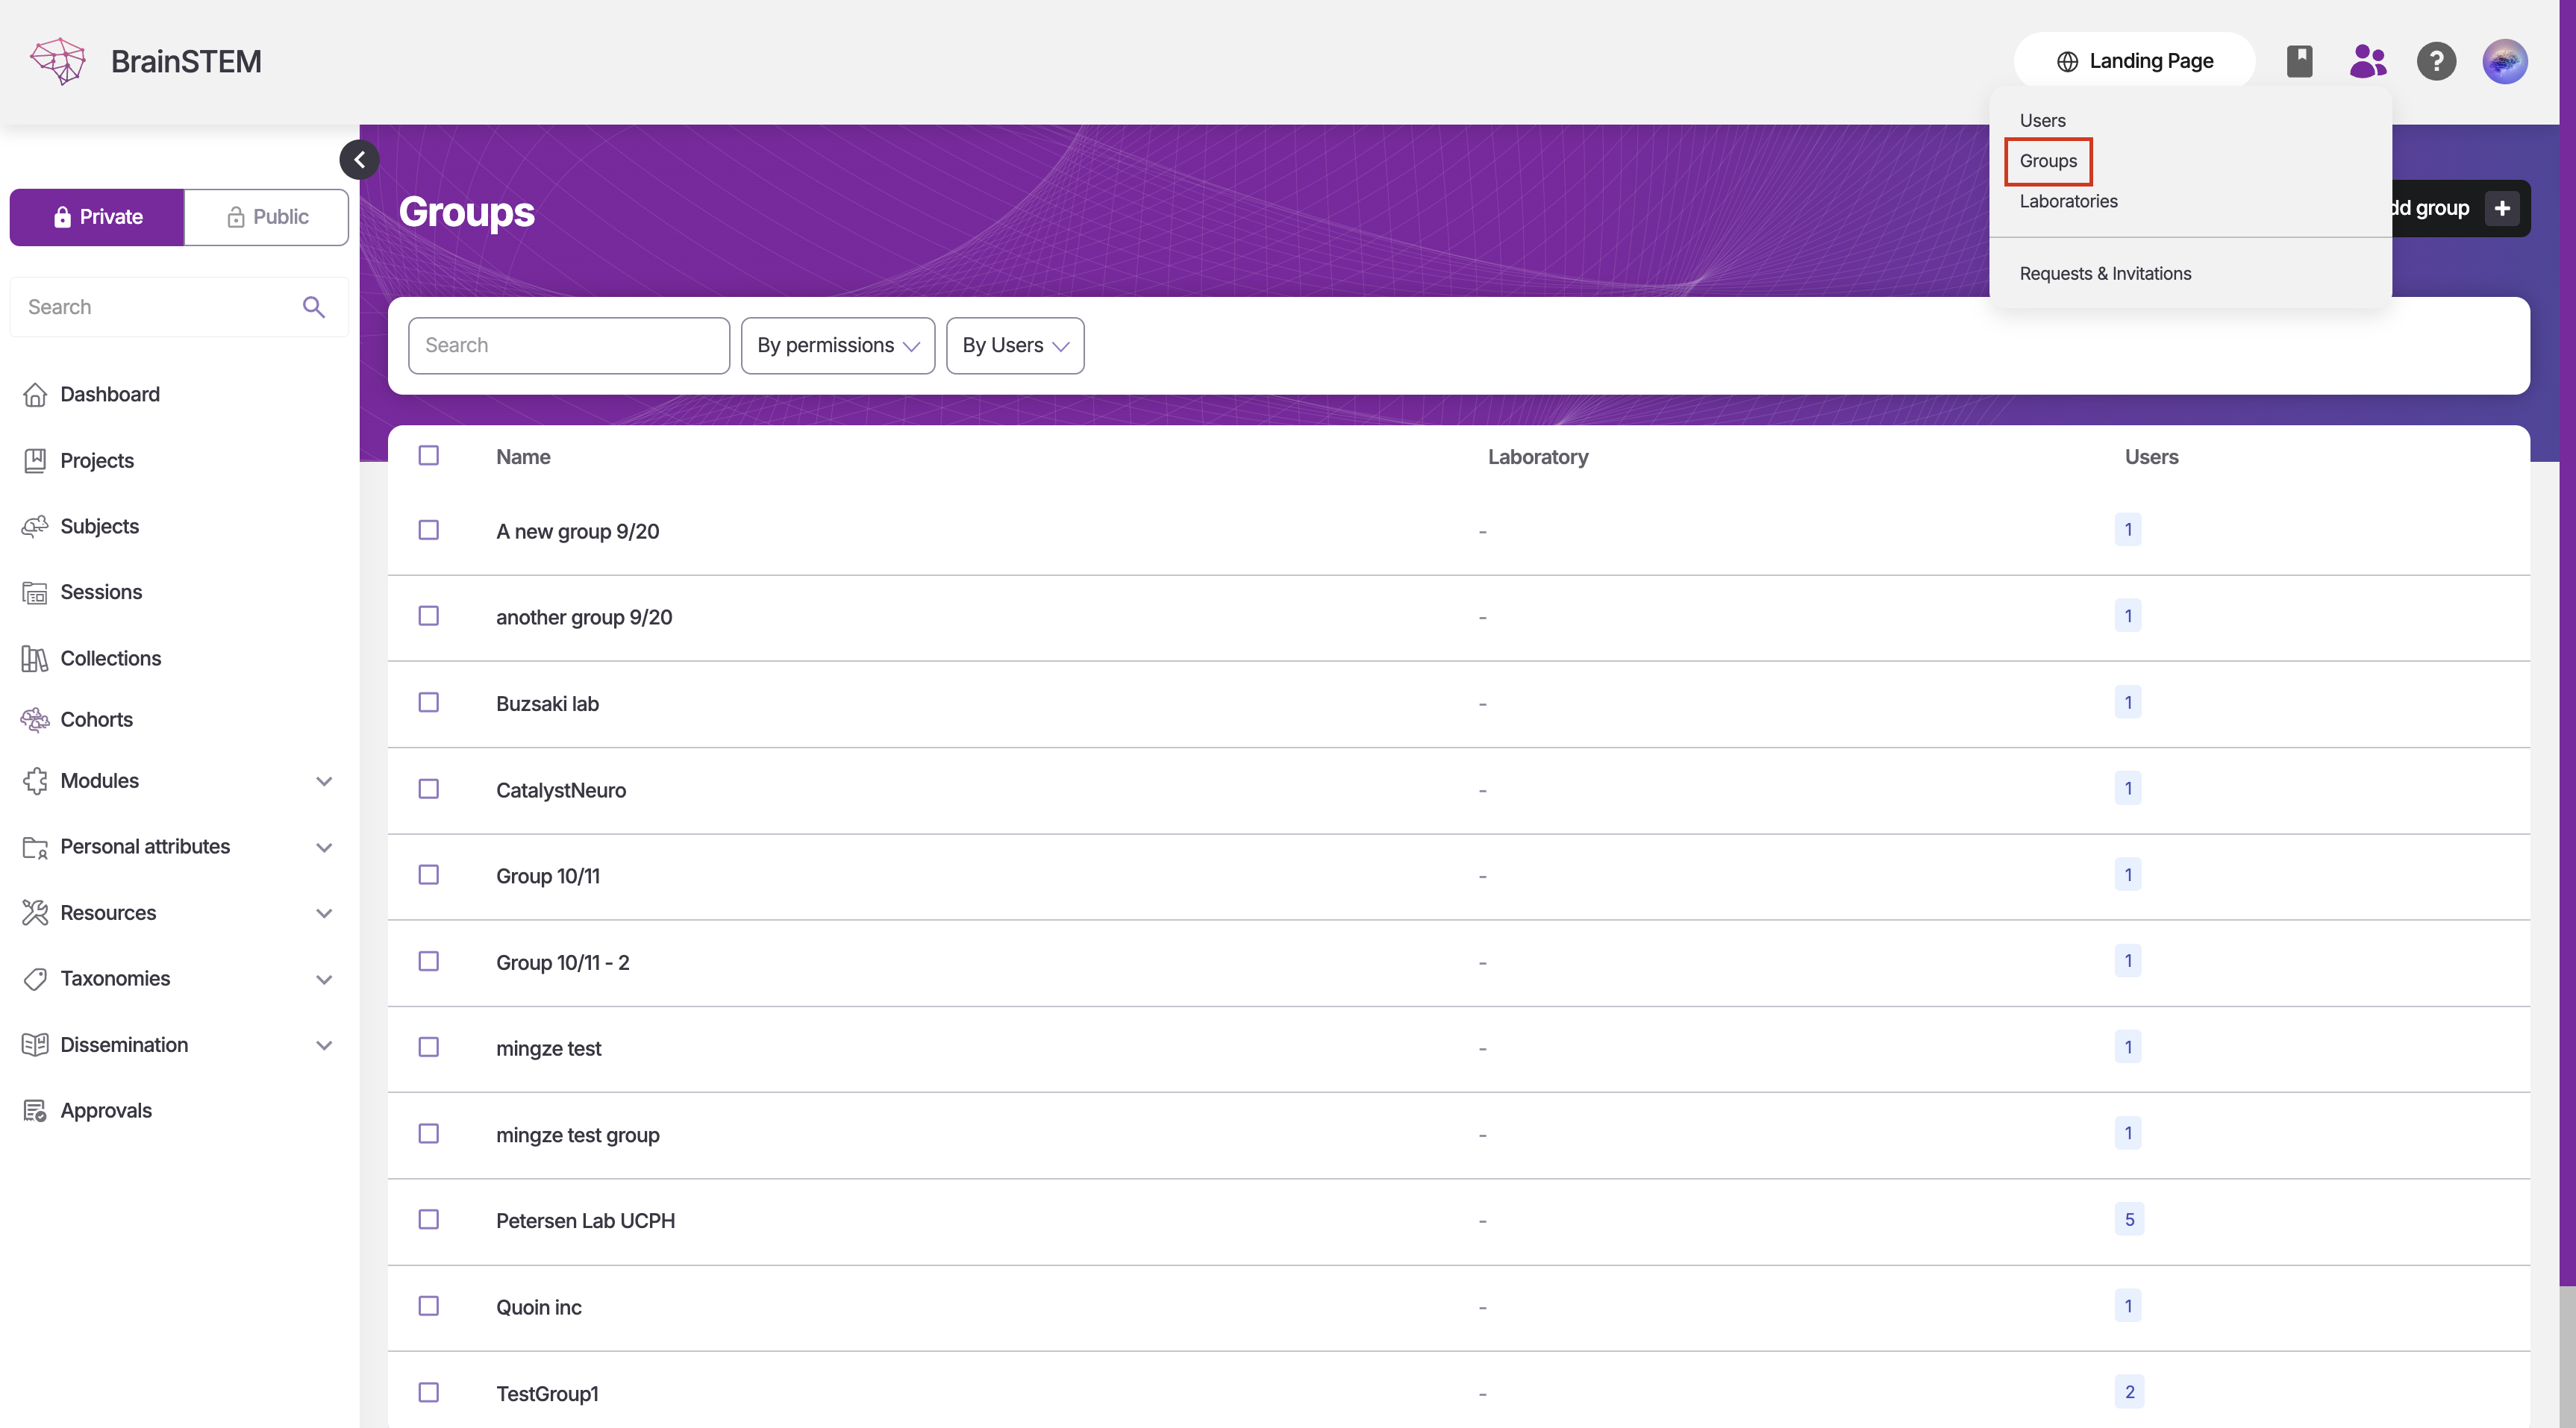
- From your dashboard, locate and click the Users icon in the top right corner of the screen
- Select Groups from the dropdown menu
Managing Group Membership
Once on the Groups page, you have two options:
Option 1: Create a New Group
If your lab doesn’t have a group yet:
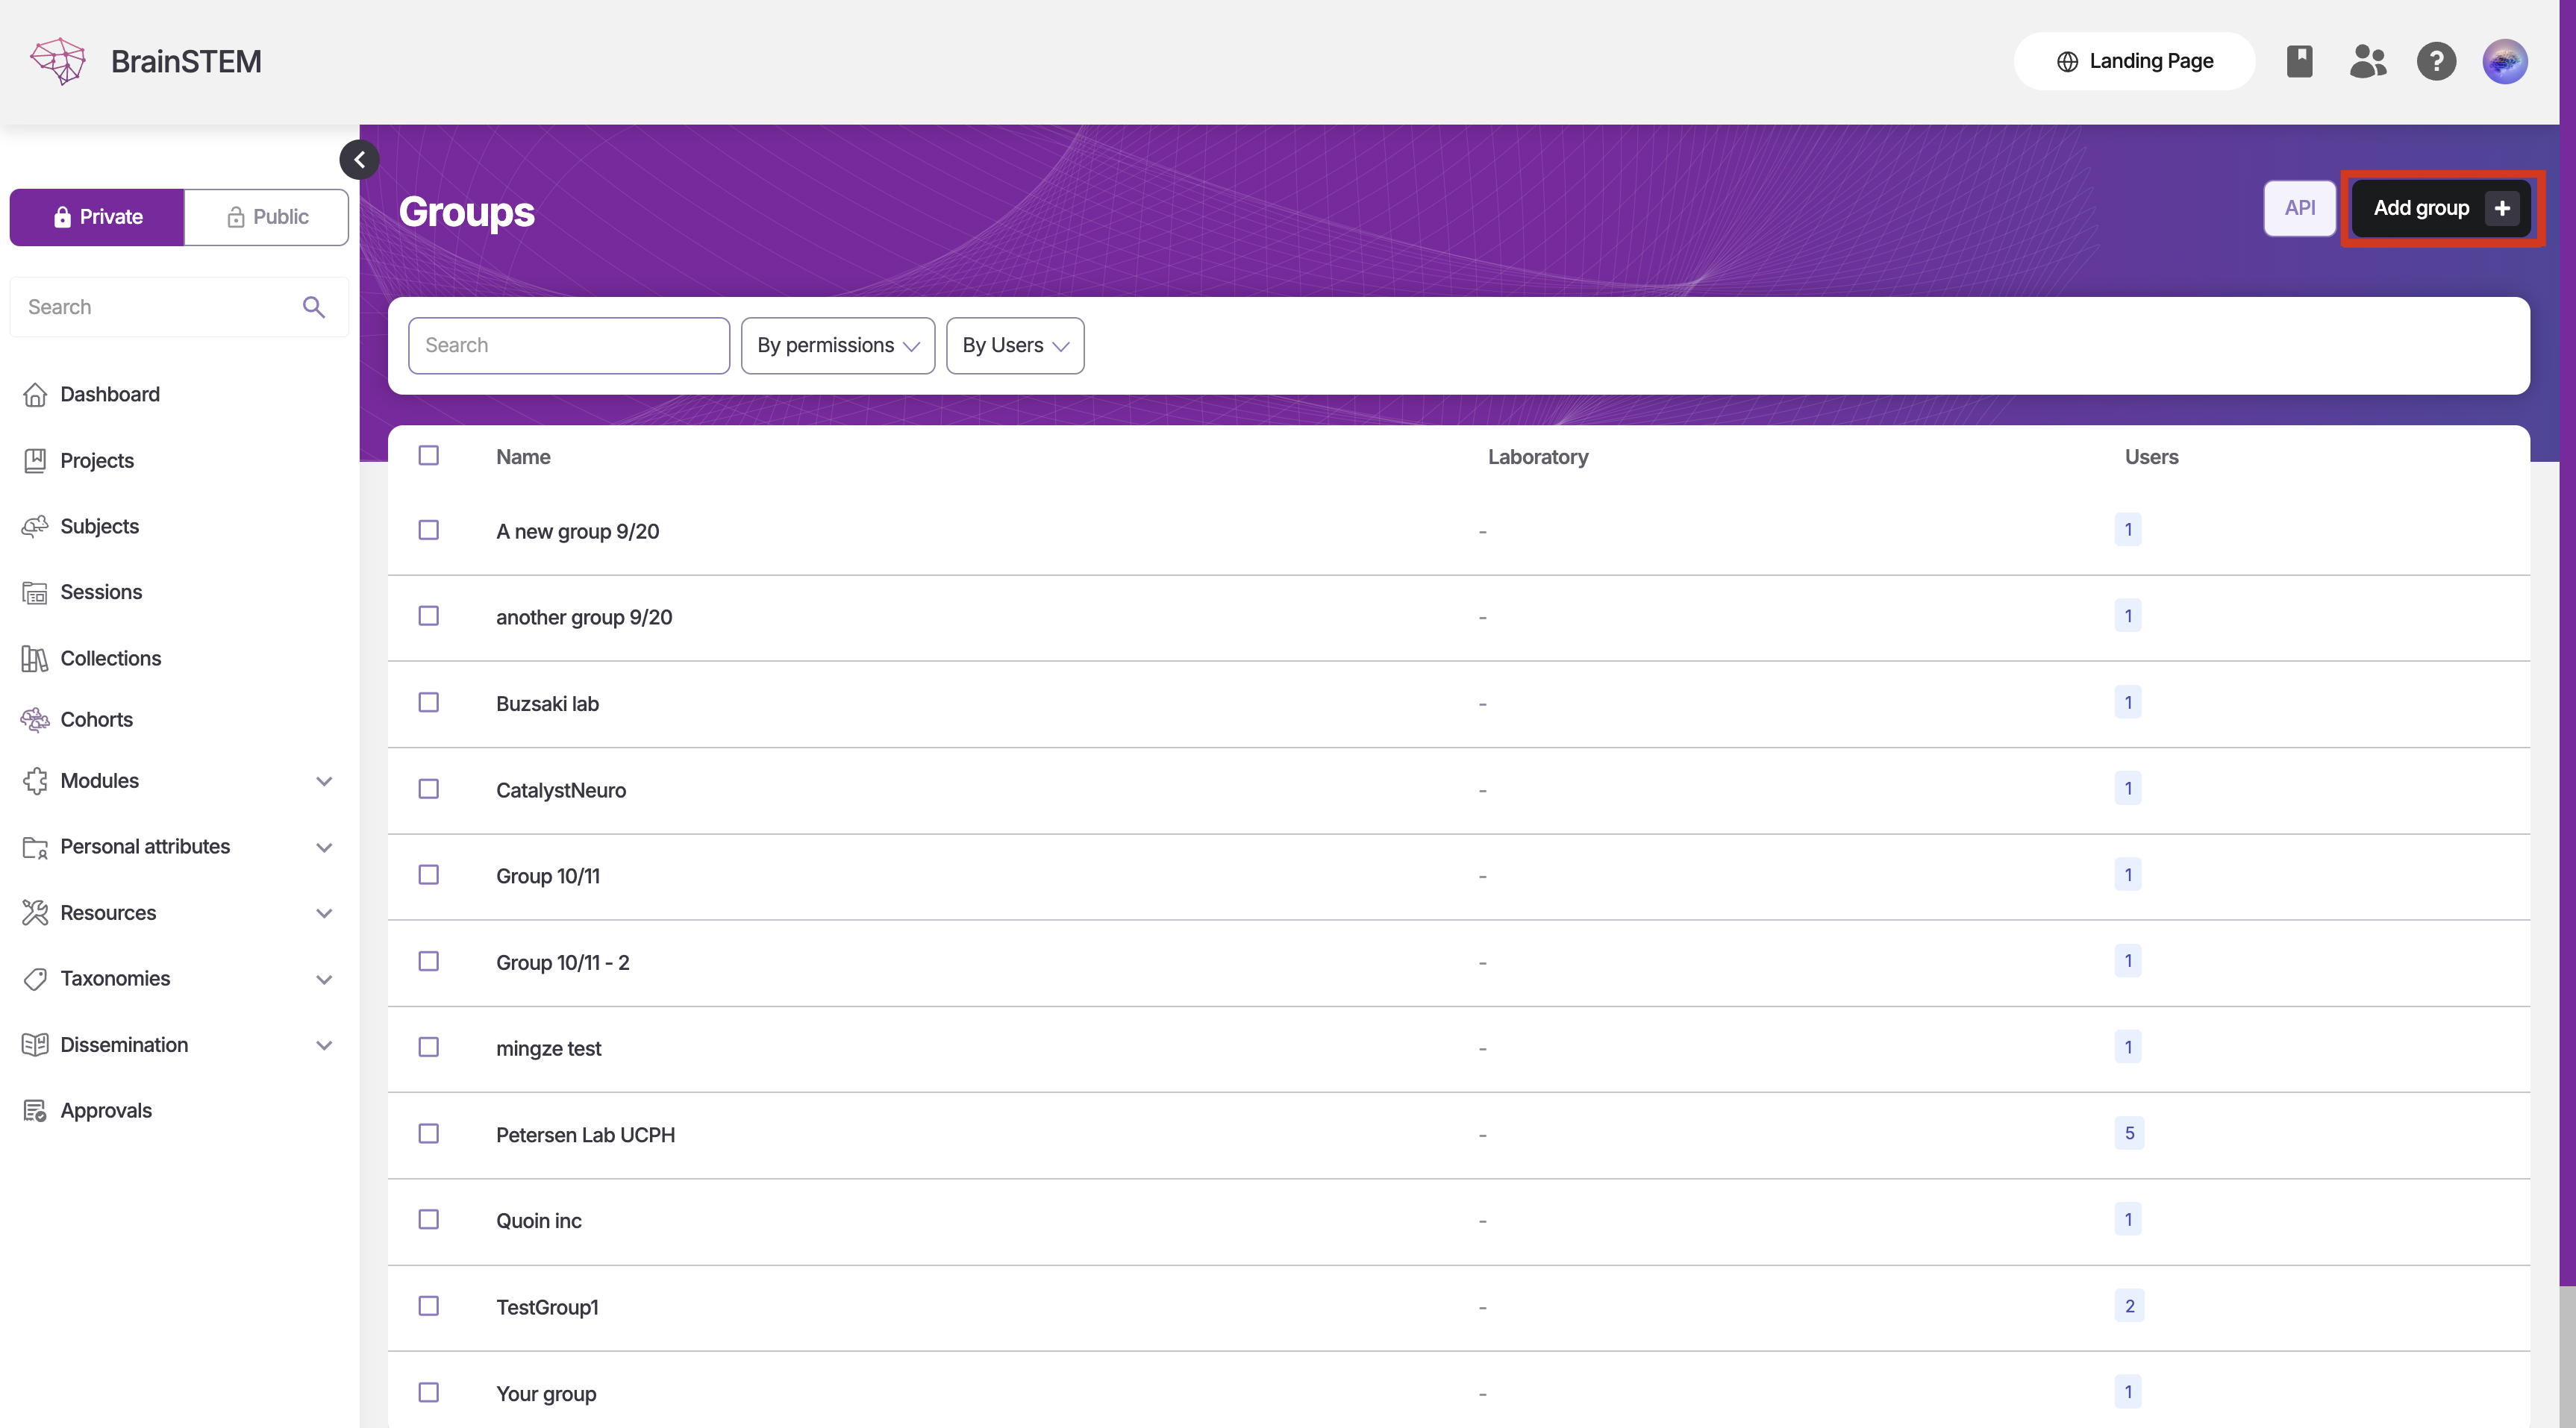
- Click the Add group button in the top right corner
- Fill in the required information for your new group
Option 2: Join an Existing Group
If your lab already has a group:
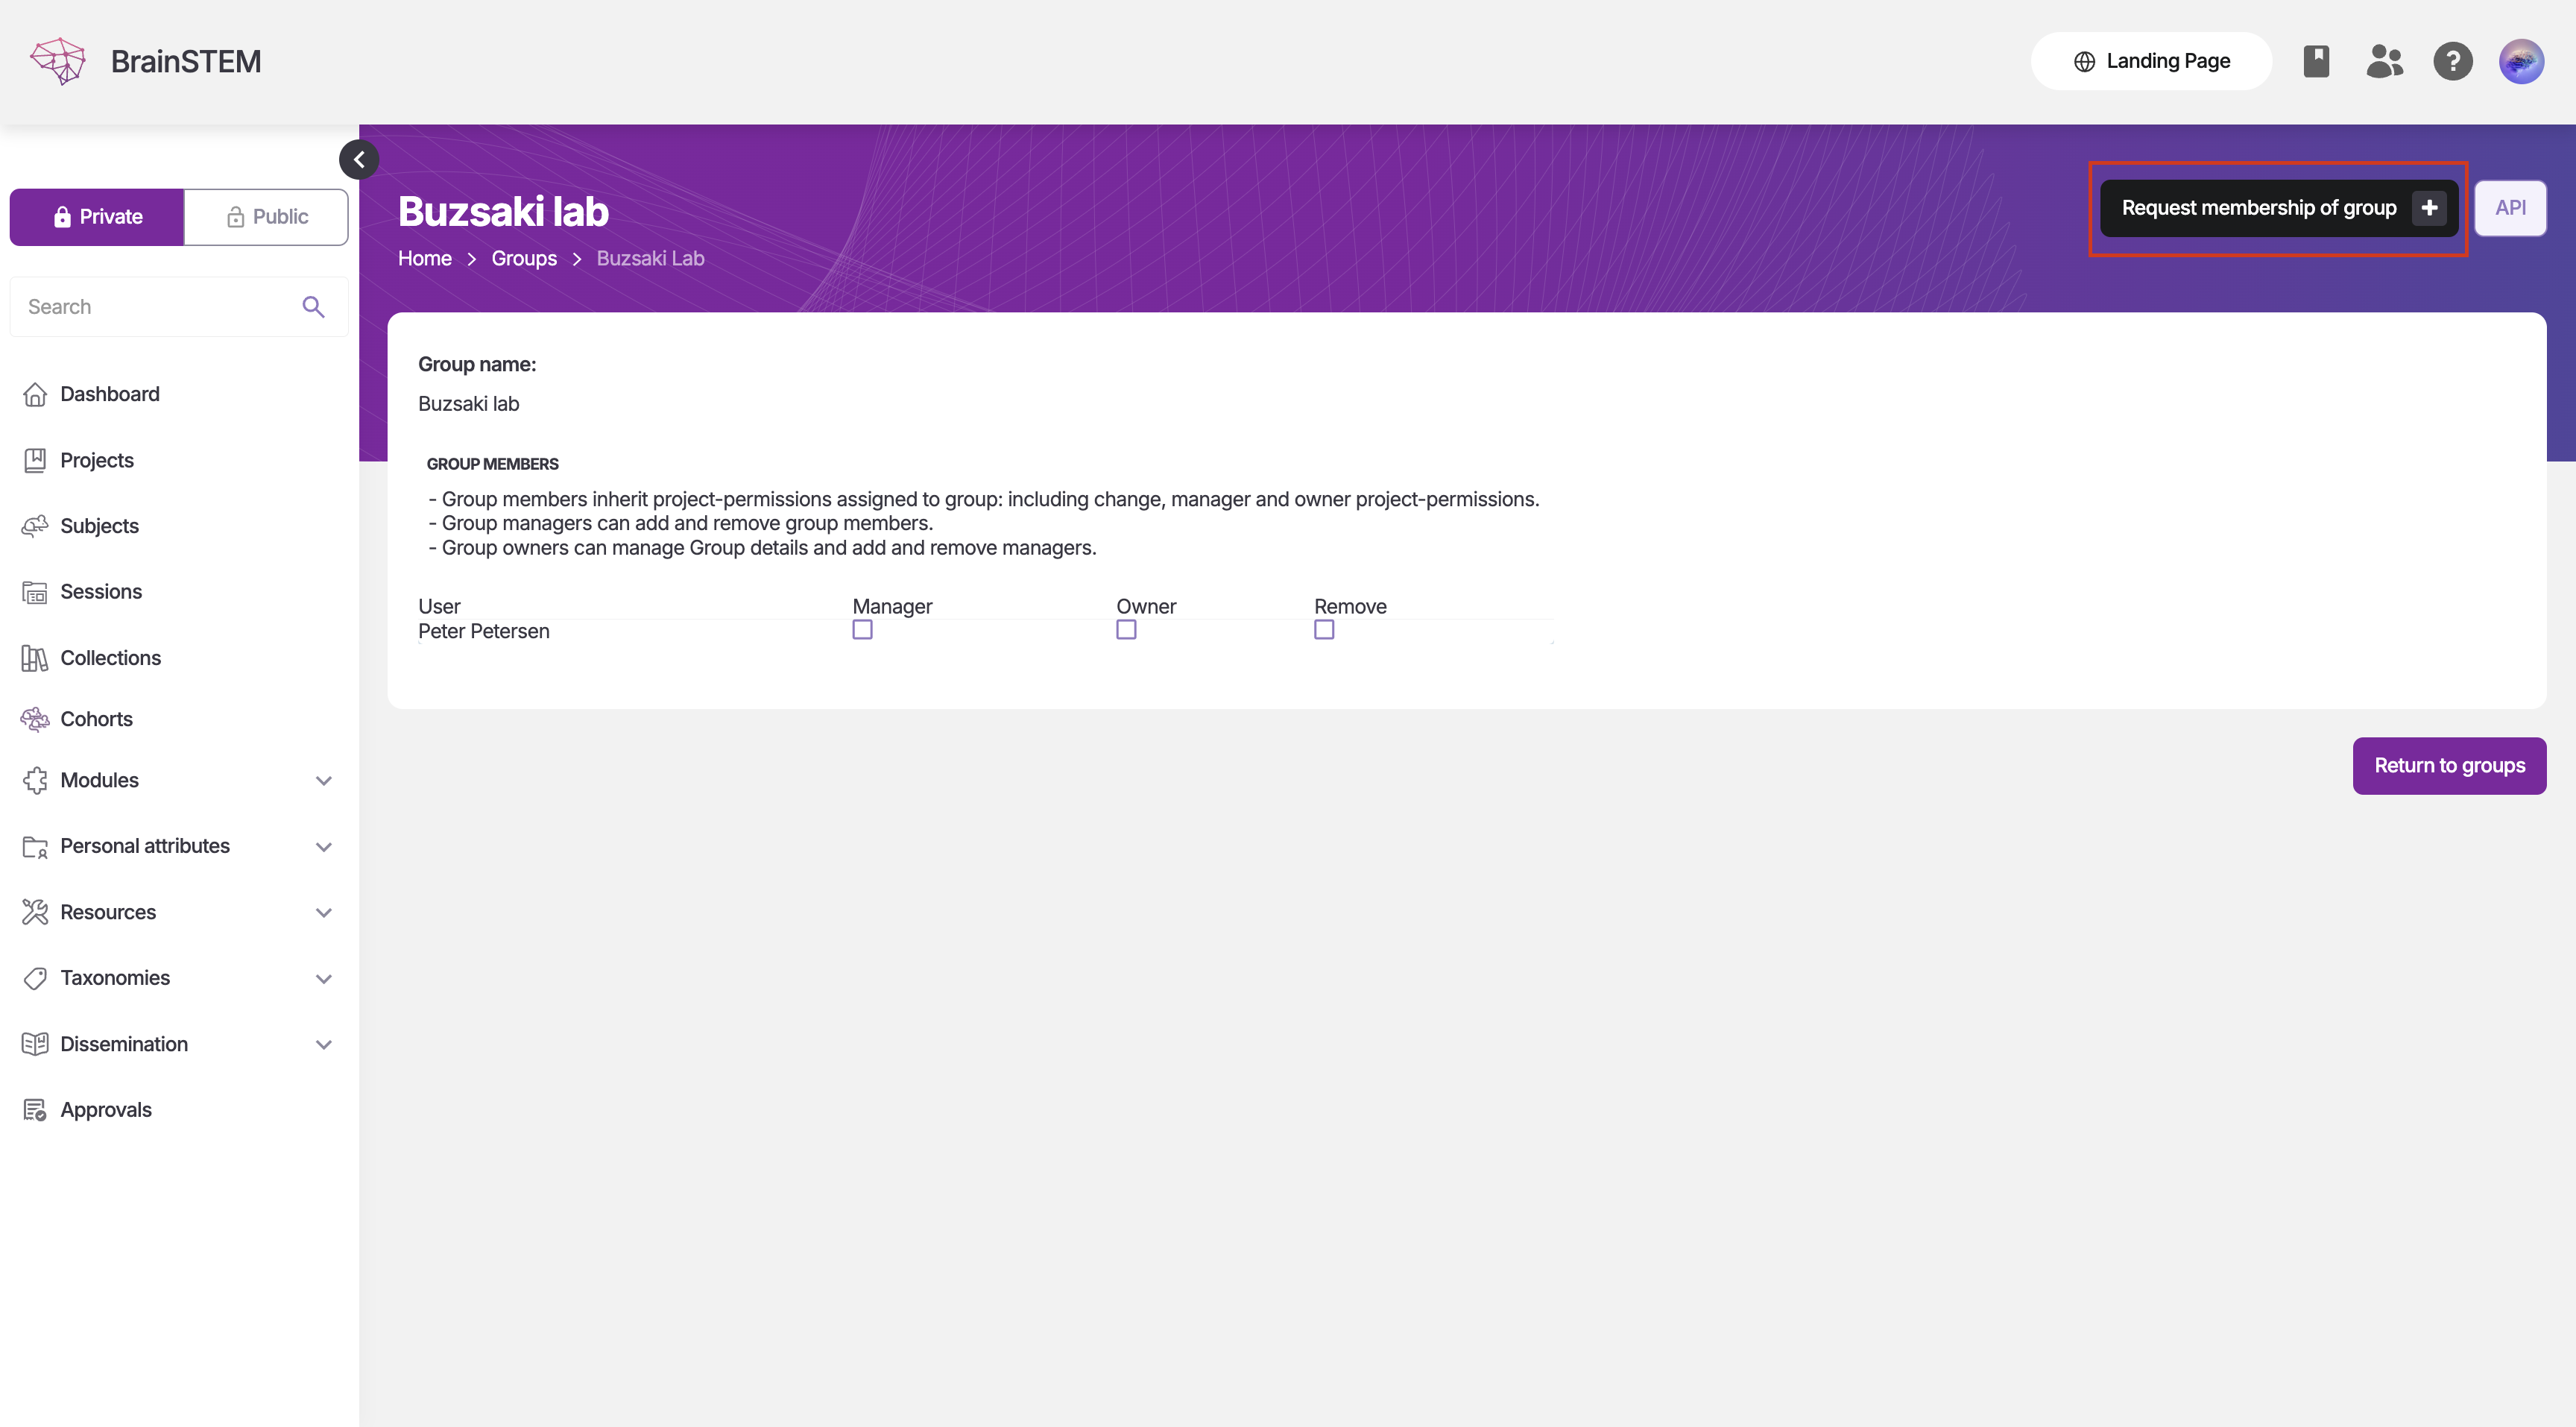
- Click on the group name from the list of available groups
- On the group’s detail page, click the Request membership of group button
- Wait for a group manager to approve your request
Managing Group Membership Requests
For group managers:
- Click the Users icon in the top right corner
- Select Requests & Invitations
- Navigate to the Group membership requests section
- Review and accept requests from your lab members
Labs should coordinate among their members to ensure proper group management. It’s recommended to have at least two group managers per lab.
Create Your First Project
After joining or creating a group, you can start creating projects. Projects in BrainSTEM are containers that help organize your research data, including subjects, sessions, and collections.
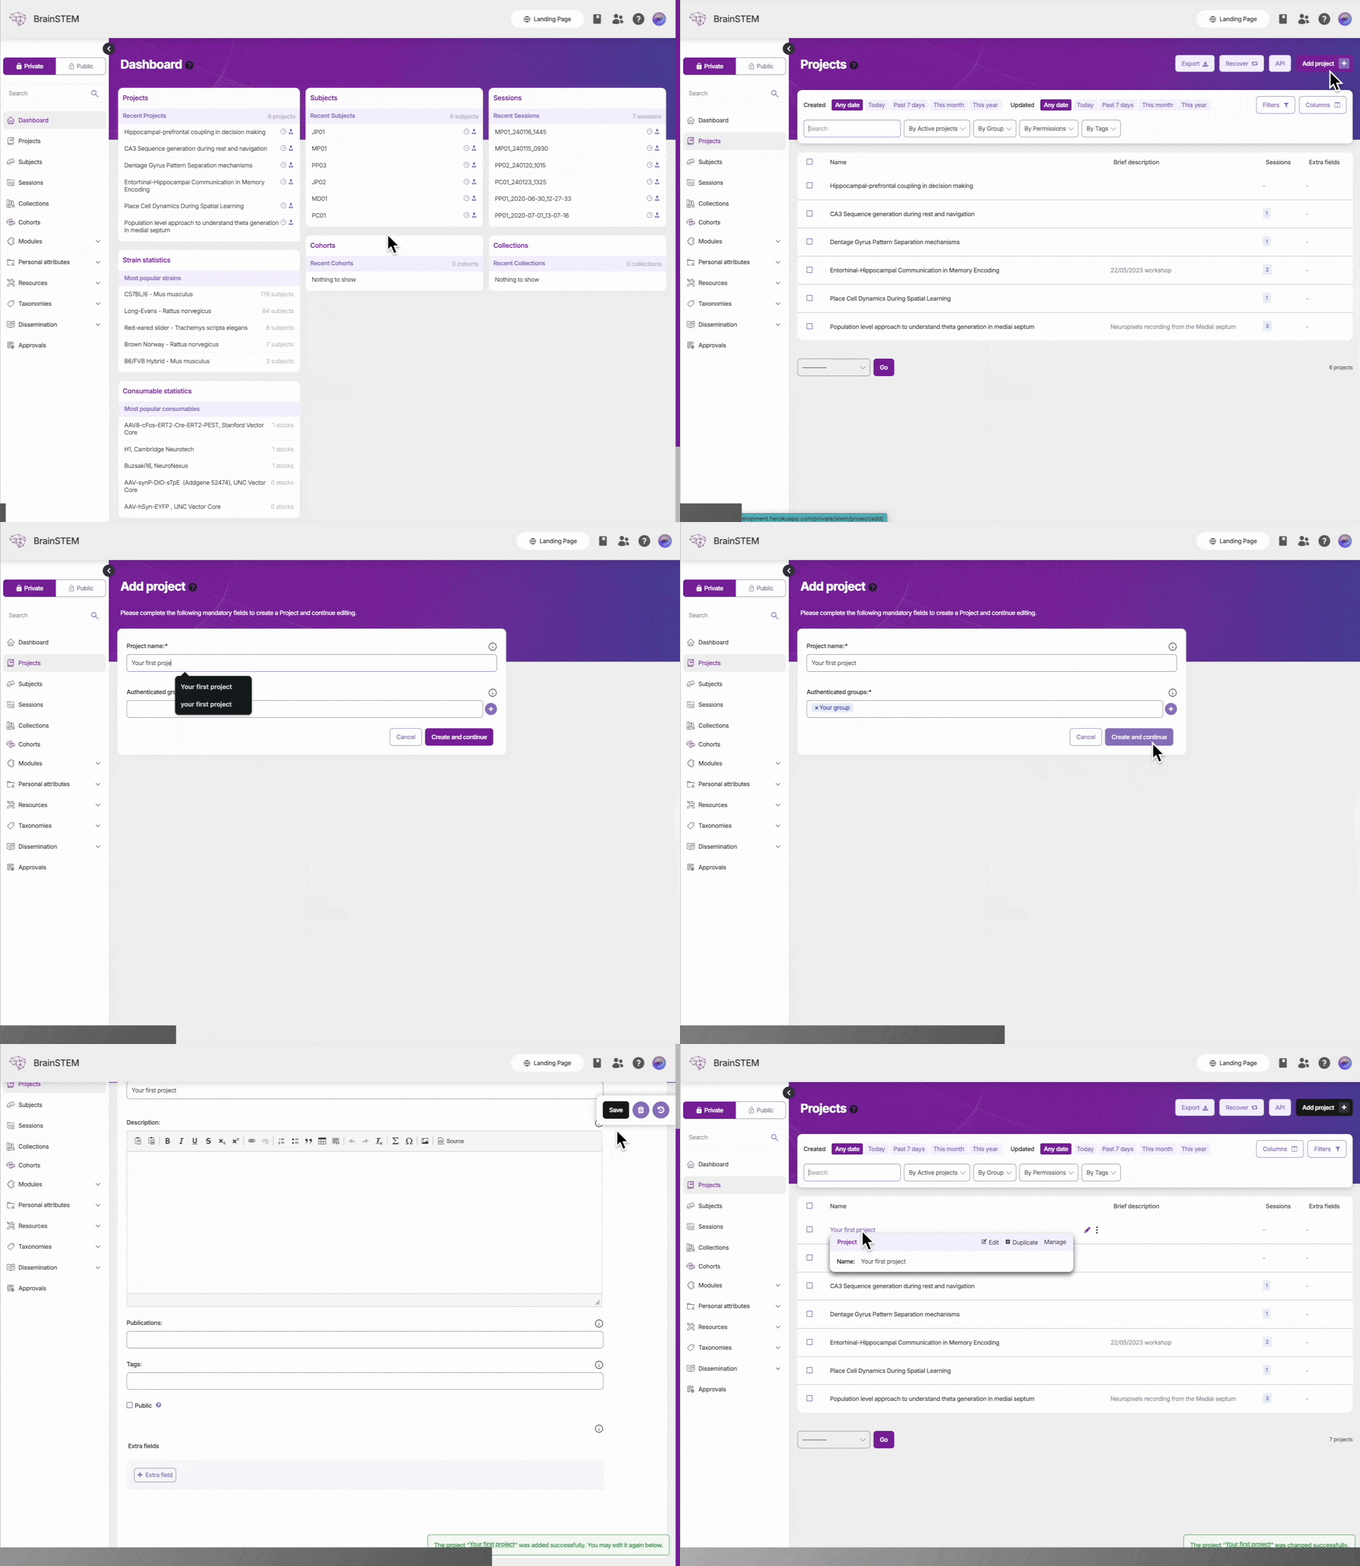
- Click on Projects in the left navigation menu
- Click the Add project button in the top right corner
- Fill in the required project information
For detailed information about project fields and structure, see the Project data model.
Add your personal attributes
Before creating subjects and sessions, set up personal attributes that describe your setups, inventories and behavioral paradigms. These provide standardized options for your experiments.
Define behavioral paradigms to describe the behavioral conditions of your subjects
- Navigate to Personal Attributes → Behavioral paradigms in the left menu
- Click Add behavioral paradigm
- Fill in the paradigm details (e.g., “Open Field Test”, “Novel Object Recognition”)
- Add a description of the experimental protocol
Set up data storage locations to link to your data files
- Go to Personal Attributes → Data storage
- Click Add data storage
- Define storage locations where your raw data files are kept (e.g., “Lab Server”, “External Drive A”)
- Include relevant path information and access details
Create setups to define your physical experimental environments
- Navigate to Personal Attributes → Setups
- Click Add setup
- Describe your experimental setups (e.g., “Theta behavior maze”, “Surgical table”, “Head-fixed 2P Virtual environment”, “Home cage”)
- Configure the equipment in your setups:
- Go to Modules → Equipment
- Add devices like “Intan RHD2000”, “Behavior Camera”, “LED Arrays”
- Associate equipment with appropriate setups
Set up inventories to track your lab resources
- Go to Personal Attributes → Inventories
- Click Add inventory
- Create inventory categories (e.g., “Silicon Probes”, “Virus stocks”)
- Add consumable stocks to your inventories:
- Navigate to Modules → Consumable stocks
- Add specific items like probe models, virus batches, drug concentrations
- Link them to appropriate inventories
These personal attributes will appear as selectable options when creating sessions, subjects, and experiments. Setting them up first streamlines your data entry process.
Now that all your personal attributes are in place, you can continue and add your first subject.
Create Your First Subject
Subjects in BrainSTEM represent the experimental animals in your studies. Subject can be created without creating personal attributes but if you want to describe procedures performed on the subject, it is recommended to add relevant setups with equipment, and inventories with consumable stocks.
- Click on Subjects in the left navigation menu
- Click the Add subject button in the top right corner
- Fill in the required subject information
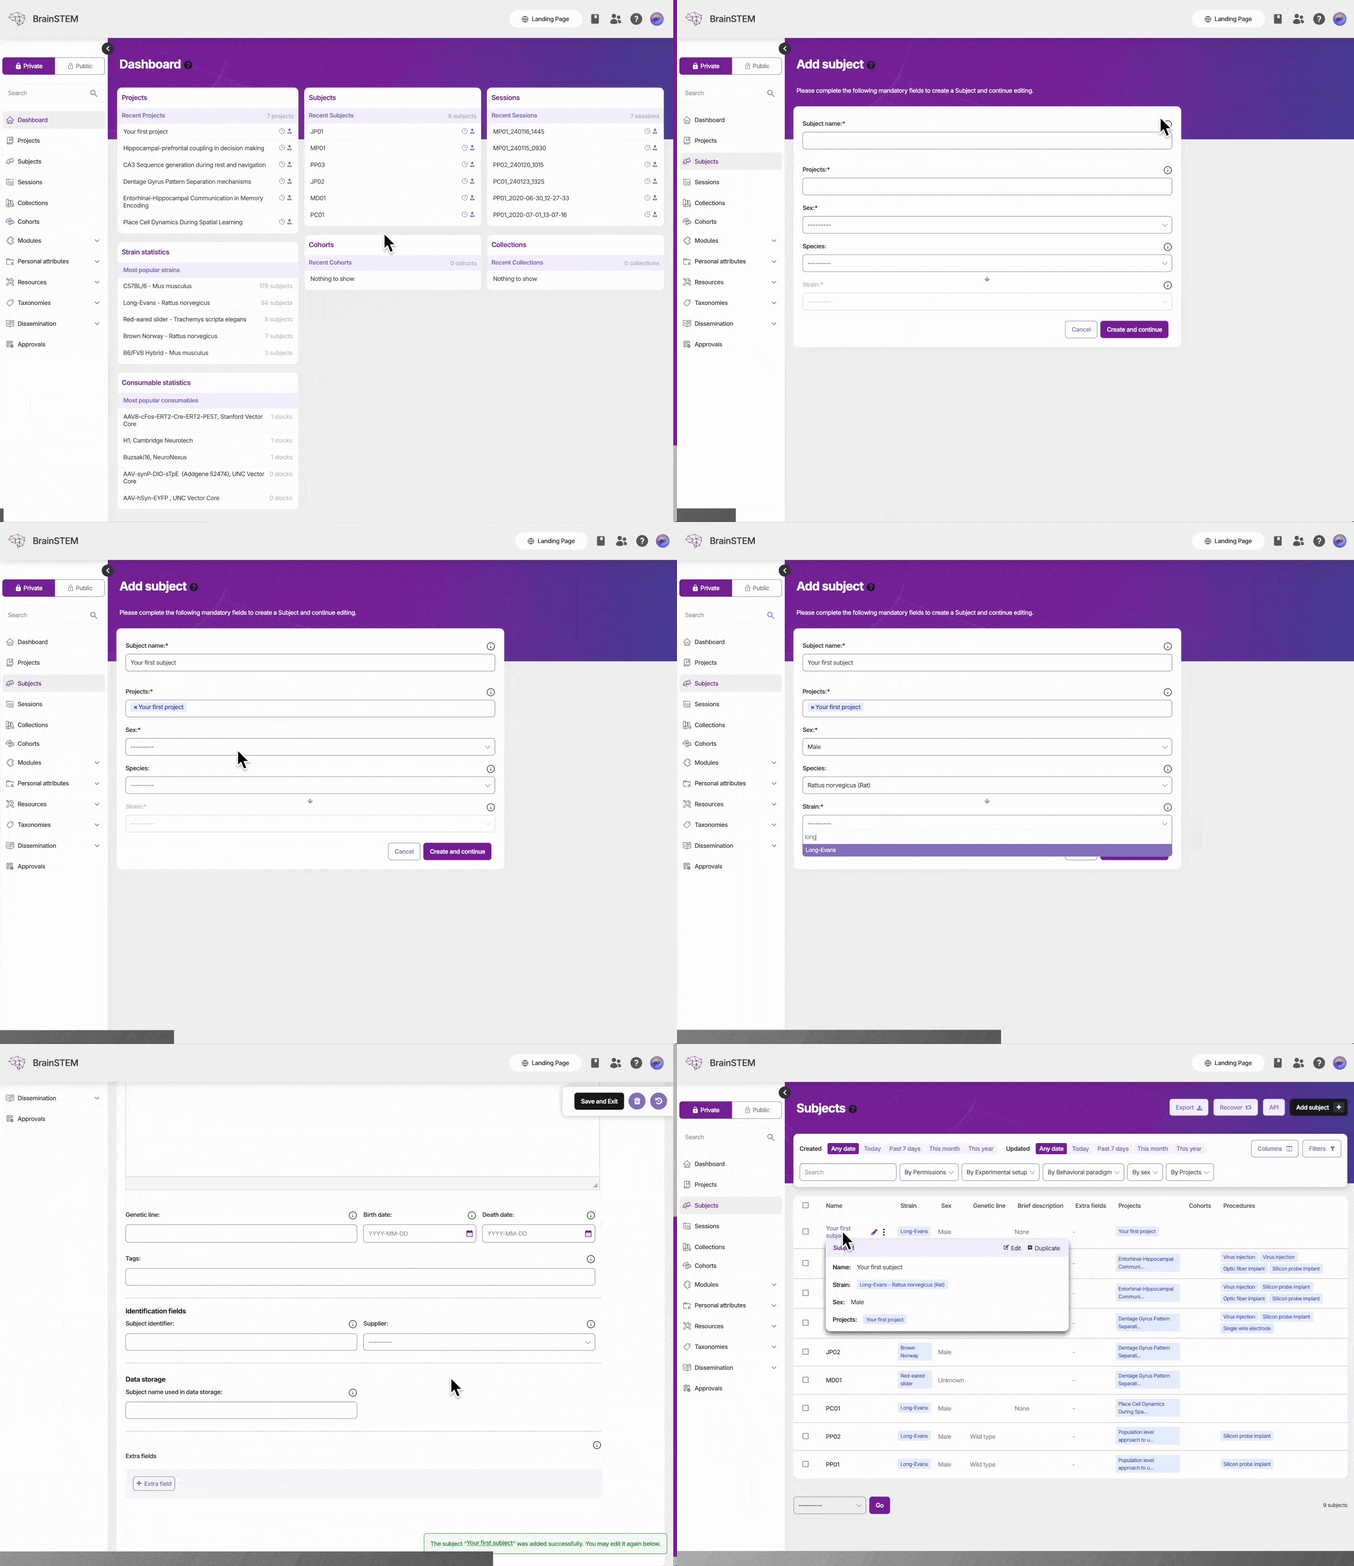
For detailed information about subject fields and available options, see the Subject data model.
Remember to associate your subject with the correct project(s) to ensure proper access and organization of your research data.
Create Your First Session
After adding subjects, you can create sessions to record your experimental data. Sessions in BrainSTEM help organize your experiments chronologically.
- Click on Sessions in the left navigation menu
- Click the Add session button in the top right corner
- Fill in the required session information
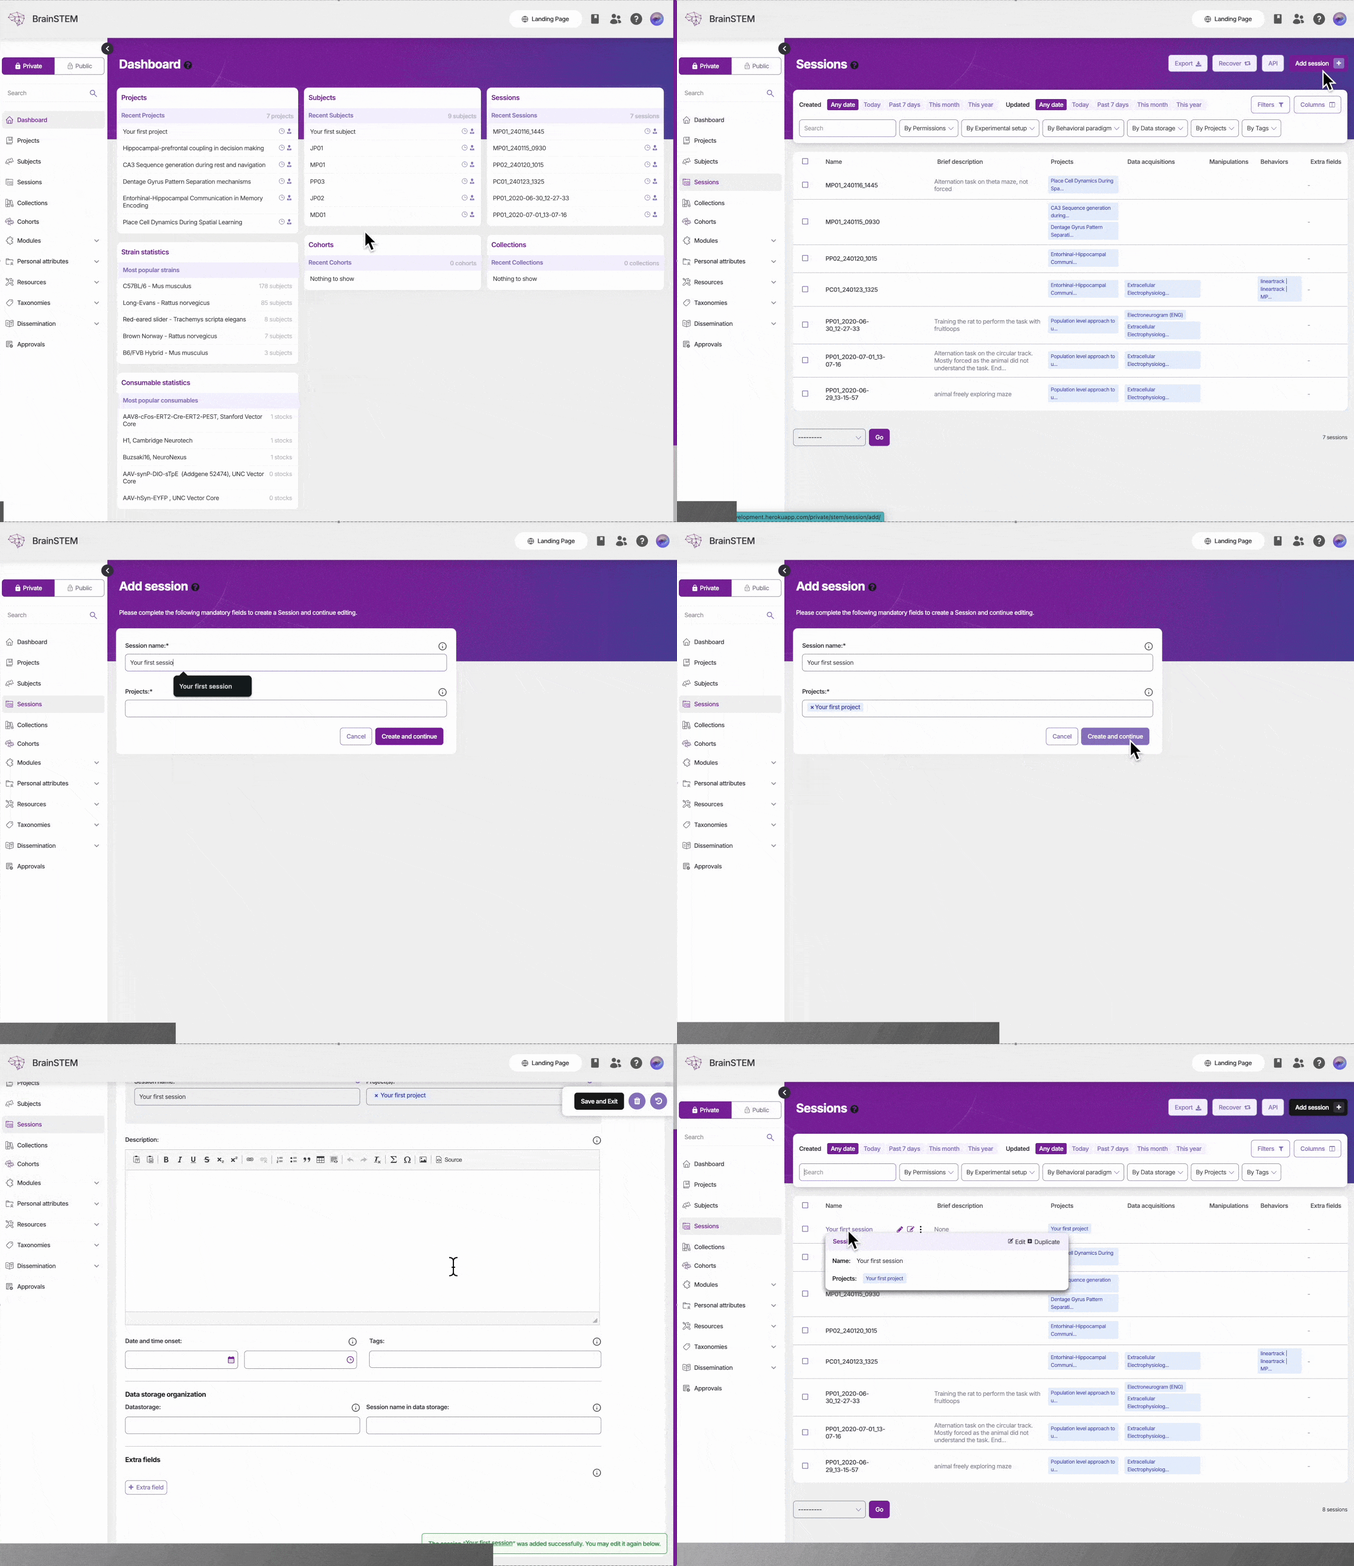
For detailed information about session fields and options, see the Session data model.
Sessions inherit permissions from their associated projects. Make sure to select the correct project to enable proper access for your team members.
Already Have Data? Import It Quickly!
Don’t want to enter everything manually? If you already have your research data in spreadsheets, our powerful import tool can save you hours of manual data entry!
Why use the import tool?
- Save time - Import dozens or hundreds of records at once
- Easy to use - Download a template, fill in your data, and upload
- Comprehensive - Supports all major data types (subjects, sessions, procedures, and more!)
Get started in 3 simple steps:
- Download a template for your data type
- Fill in your data following the provided examples
- Upload and review - we’ll check for errors and show you the results
Ready to import? Check out our complete Import Tool Guide for detailed instructions and templates!
Build Your Own Experiment
BrainSTEM uses Personal Attributes and Modules to document your experimental procedures. Below is a recommended order for setting up your experiment components.
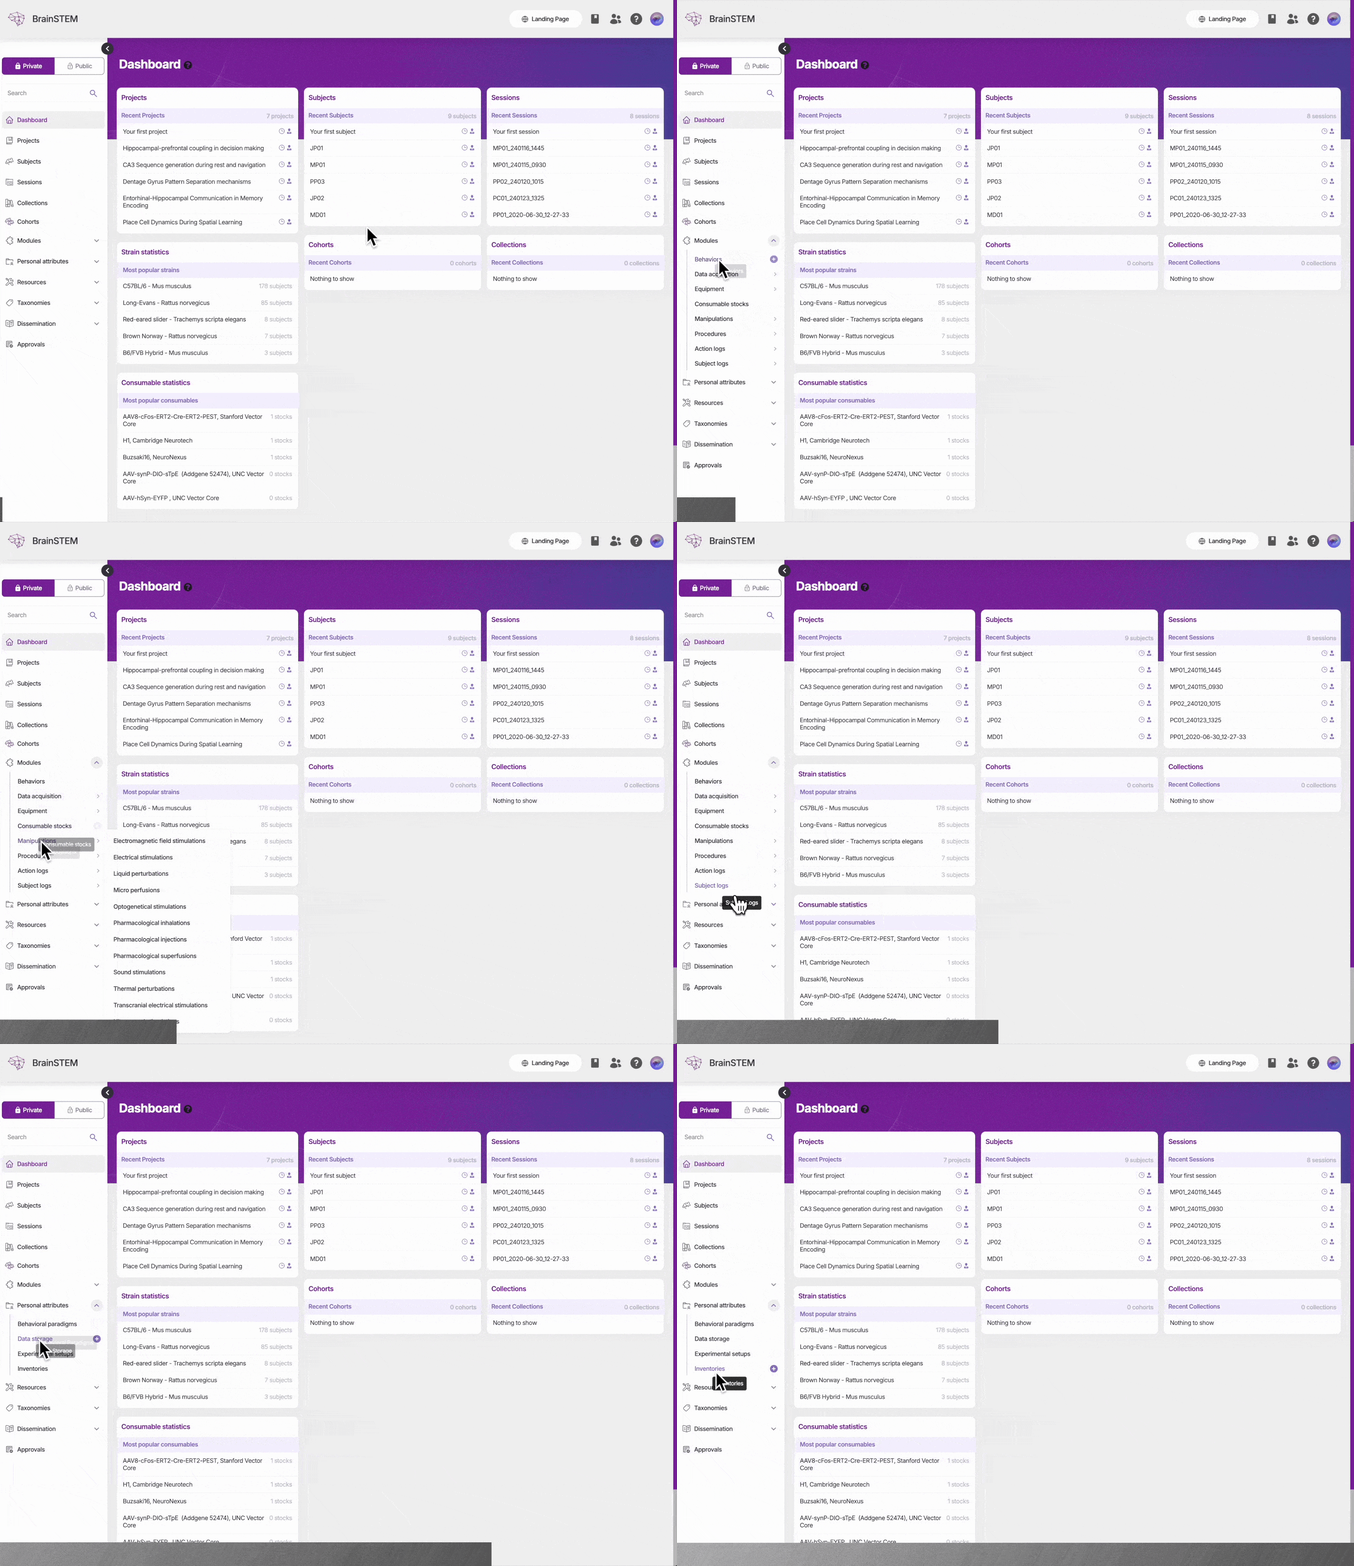
Available Components
STEM models
Personal Attributes:
Recommended workflow
- Create/Join a group
- Create a project
- Next, create personal attributes relevant to your experiments
- Define behavioral paradigms to describe the behavioral conditions of your subjects
- Set up data storage locations to link to your data files
- Create setups to define your physical experimental environments
- Configure the equipment in your setups
- Set up inventories to track your lab resources
- Add consumable stocks to your inventories
- Create your first subject
- Add procedures to the subject (e.g., implants and injections)
- Begin tracking with procedure logs and subject logs
- Create your first session
- Set up behaviors to describe subject tasks
- Configure data acquisition parameters
- Define manipulations for experimental interventions
The exact order may vary based on your specific experimental needs. Some components can be set up in parallel or may not be needed for every experiment.
This order ensures dependent components are created first. For example, behaviors need setups and behavioral paradigms to be defined first. Data acquisition are linked to subjects through procedures, and to setups through equipment, which should be created first.
Next Steps
Now that you’ve completed the basic setup, here are the recommended next steps:
- Set up your lab infrastructure: Follow the Setting Up Lab Infrastructure tutorial to properly configure your lab’s setups, equipment, inventories, and consumable stocks
- Learn project management: Read Managing Projects to understand how to effectively organize and collaborate on research projects
- Configure team access: Review Managing Groups to set up proper permissions and team collaboration
- Plan your experiments: Explore Behavioral Paradigms to define standardized experimental protocols for your studies
- Set up data storage: Follow Managing Data Storage to link your metadata to actual data files for seamless analysis workflows