List view
Table of contents
- Overview
- Toolbar
- Search
- Filters
- Active projects
- Columns
- Sorting
- Pagination
- Row actions
- Bulk actions
- Help icon
- Recover deleted entries
- Related
Overview
Every kind of entry has a list view: a table of entries with a search box, filters, configurable columns and bulk actions. Open a list from the left sidebar (for example Subjects → Procedures). Several entry types also have per-type list pages, for example a list of silicon probe implants only; on these pages every type-specific field is available as a column and the type filter is dropped.
Anonymous visitors to the public portal see a reduced list view without filters, sorting, column settings or bulk actions.
Toolbar
Above the table you find:
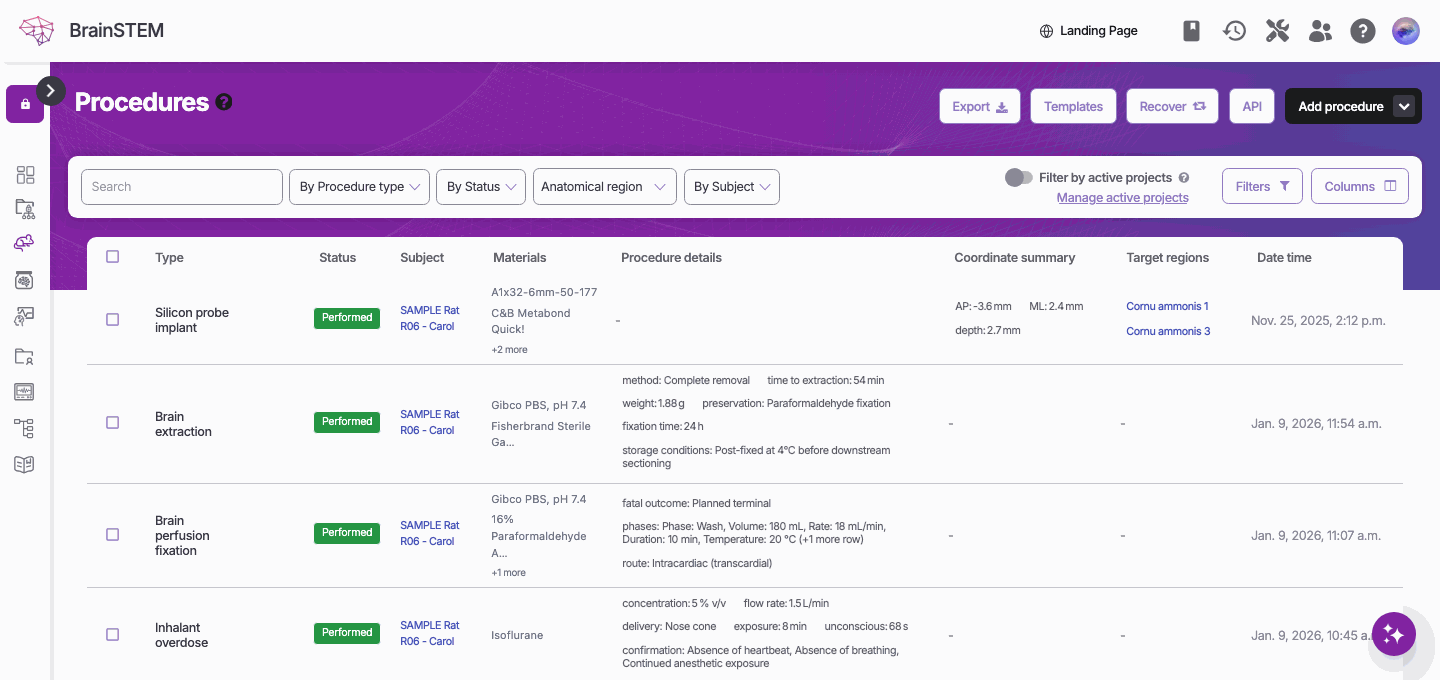
The procedures list with its toolbar: search, Filters, Columns and the filter chips.
- Add {entry type} creates a new entry. For procedures, data acquisitions, manipulations, specimen procedures, procedure episodes and experimental interfaces the button is a dropdown with Create blank and Create from template.
- Recover opens the list of deleted entries you can restore, see Deleted entries.
- API opens the same list in the web API.
- Templates (on the procedure list) opens the procedure templates.
- Export downloads the list as a spreadsheet, with its search and filters applied. It is offered on most lists, see where spreadsheet export is offered.
- Filters and Columns open the dialogs described below. On narrow screens these two buttons are hidden.
- The Created and Updated date filters are shown as tag-style links.
Search
Type in the Search box and press Enter or click the magnifier. The search matches the text fields of the entries. Search terms are combined with any active filters.
For searching across entry types in plain language, see the AI assistant.
Filters
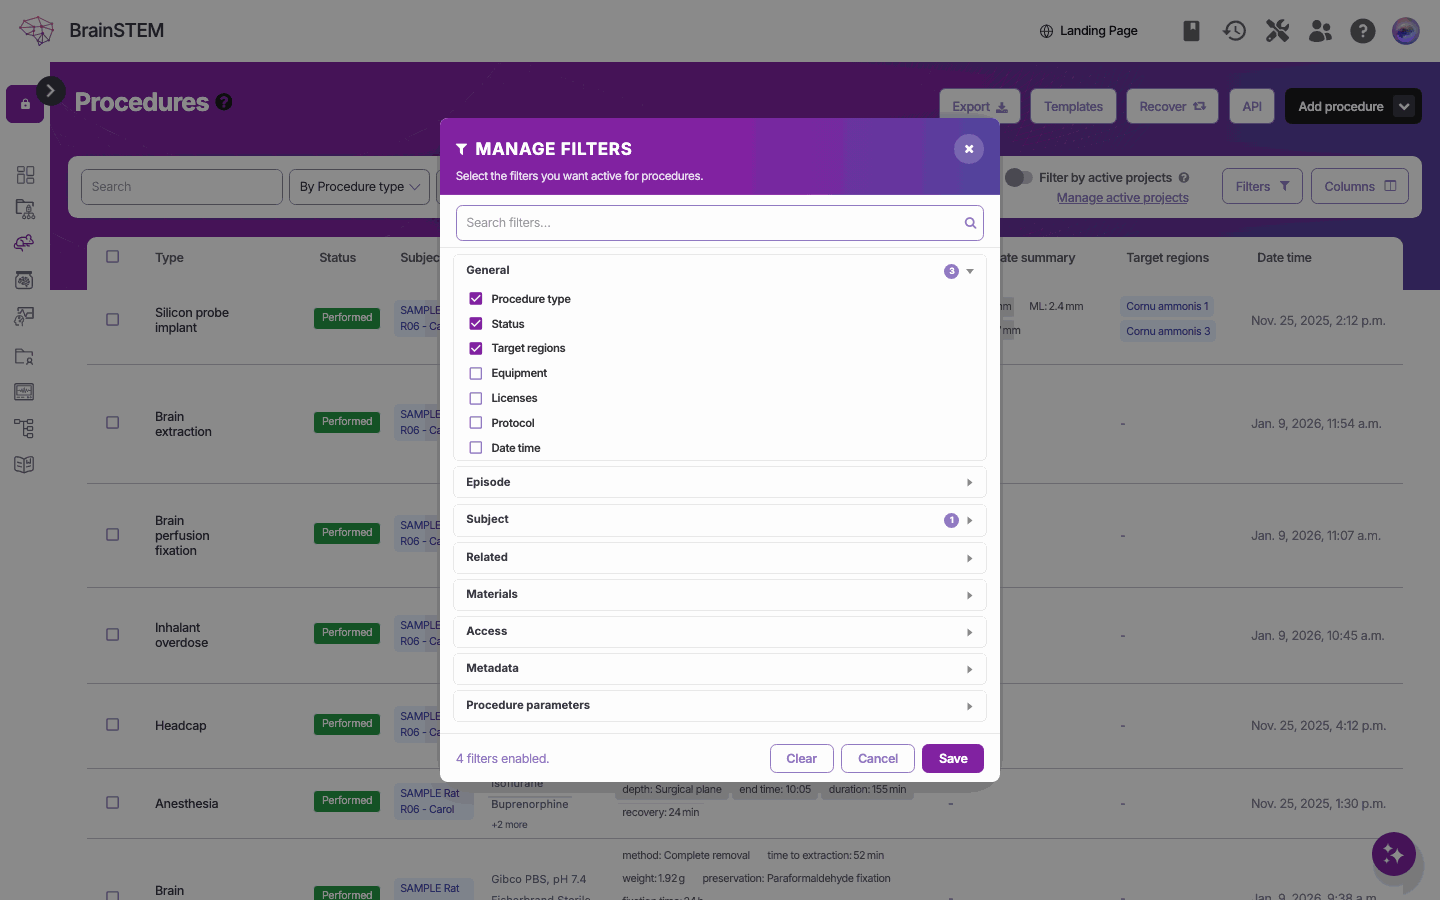
Filters sit in a horizontal toolbar above the table. Each filter is a dropdown whose first option reads By {filter}; numeric range and anatomical region filters have their own inline widgets. Which filters are offered depends on the kind of entry.
| Filter kind | Examples | Behaviour |
|---|---|---|
| Date | Created, Updated, date and time, birth date | Any date, Today, Past 7 days, This month, This year; nullable dates add No date / Has date |
| Choice | Status, sex, Public status, Severity scheme, type filters such as Procedure type or Data acquisition type | Type filters list only the values that are actually used |
| Type-specific choice | File format and other fields stored in an entry’s type-specific details | Values are read from the saved details |
| Numeric range | Number of channels, Sampling rate, Injection volume, Weight, Shank length | See below |
| Anatomical region tree | Target regions, Anatomical regions | See below |
| User | User, Ownership (My items / Others) | Only users who own entries in the list are offered |
| Permissions | Permissions | Member, Contributor, Manager, Owner: your level on the entry’s projects |
| Project | Projects, Collections, Publication, Public project, Group, Cohorts, Licenses | Related entries, built from the rows in the list |
| Tags | Tags | Only tags present on the listed rows |
| Planning status | Status | Performed, Planned, Cancelled, Planned or cancelled; see Planning |
| Active projects | Active projects → Yes (project list) | Shows your active projects |
Each inline widget has its own ✕ to clear it. The page shows 50 entries per page.
Numeric range filters
A numeric range filter is a small row of controls: an operator, a number, a second number for ranges, and a unit where the field has one. Operators are grouped under Value (=, >, ≥, <, ≤) and Range (< X <, ≤ X <, < X ≤, ≤ X ≤). Press Enter to apply.
Units are converted: a sampling rate typed in kHz matches entries stored in Hz. For fields that hold a list of values, an entry matches when any of its first 20 values matches.
Numeric filters exist for data acquisitions (channels, sampling rate, number of samples, frame rate, number of frames, resolution), procedures (34 filters such as Injection volume, Injection rate, Concentration, Virus titer), consumables (23 filters such as Number of channels, Number of shanks, Shank length, Shank pitch), subject logs (Weight, Body condition score, Pain score, …), specimen procedures (Temperature, Section thickness, Number of sections, …), manipulations (Duty cycle, Repetitions) and specimens (Cut order, Thickness, Relative position, Passages since establishment).
Anatomical region filter
Click the Anatomical region pill to open the Anatomical regions filter dialog. Choose an atlas (grouped by species; the Allen Mouse CCF is the default), search regions with Search regions… and tick the regions you want. Options:
- Include subregions in filtered regions (on by default) also matches entries targeting child regions.
- Show only available regions hides regions with no data; a Refresh availability button recounts. Dots mark Data available and Data available in subregions.
- Up to 50 regions can be selected at once.
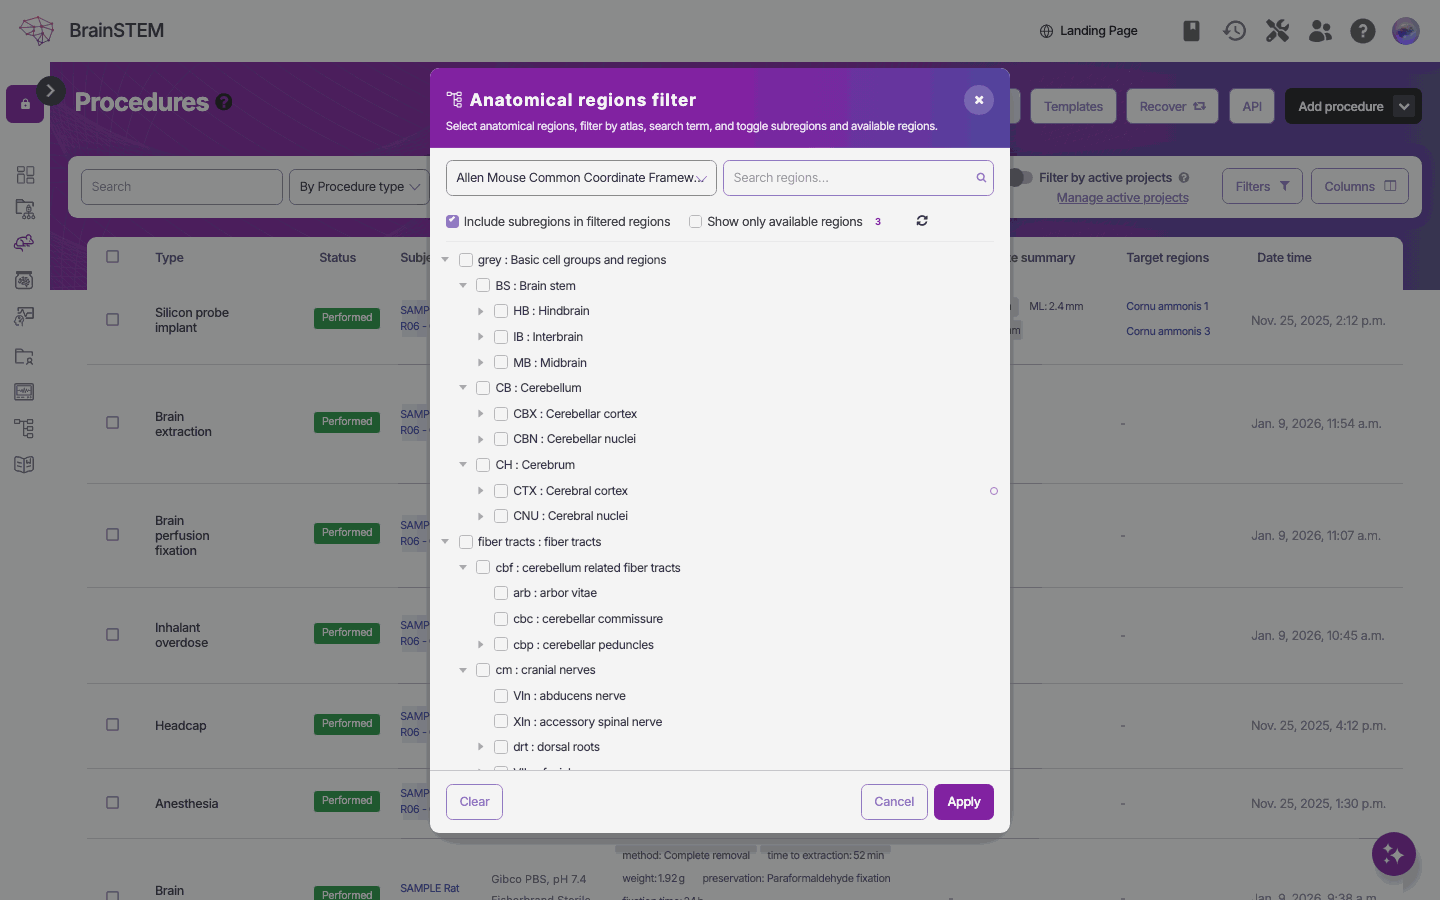
The Anatomical regions filter dialog of the procedures list: atlas choice, region search, the region tree, and the subregion and availability options.
Click Apply. Active regions show as acronym tags on the pill (up to three, then “+N”). On subject and project lists the filter looks across procedures, interfaces, specimen sets and specimen procedures; on the session list across data acquisition and manipulation interfaces. Cohort and specimen lists use a flat dropdown instead of the tree.
Choosing which filters appear
Click Filters to open Manage filters. This dialog chooses which filter widgets are shown in the toolbar, not their values. Filters are listed in collapsible groups (for sessions: Session, Subjects, Specimen sets, Consumables, Project related, Data storage, Setups, Behaviors, Data acquisition, Manipulations, Experimental interfaces, Access, Metadata). Search with Search filters…, tick the filters you want and click Save. A dot marks filters that are currently applied. Clear unticks everything.
Your choice is saved per entry type and per portal, and follows you across devices. Filters added in later releases are merged into your saved choice. A filter that is present in the page URL is always shown, even if you hid it.
Filter values live in the URL
The values of filters, the search term, the sort order and the page number are stored only in the page URL. Bookmark or share the URL to keep or pass on a filtered view. When you open an entry from a filtered list and return, the filters are kept. Nothing about filter values is saved on the server.
Active projects
The Filter by active projects switch (shown as Active projects when space is short) appears in the toolbar of project-scoped lists: sessions, subjects, projects, cohorts, collections, breedings, specimens, specimen sets, procedures, data acquisitions, manipulations, episodes, interfaces, templates and logs. It also appears in the dashboard tools bar.
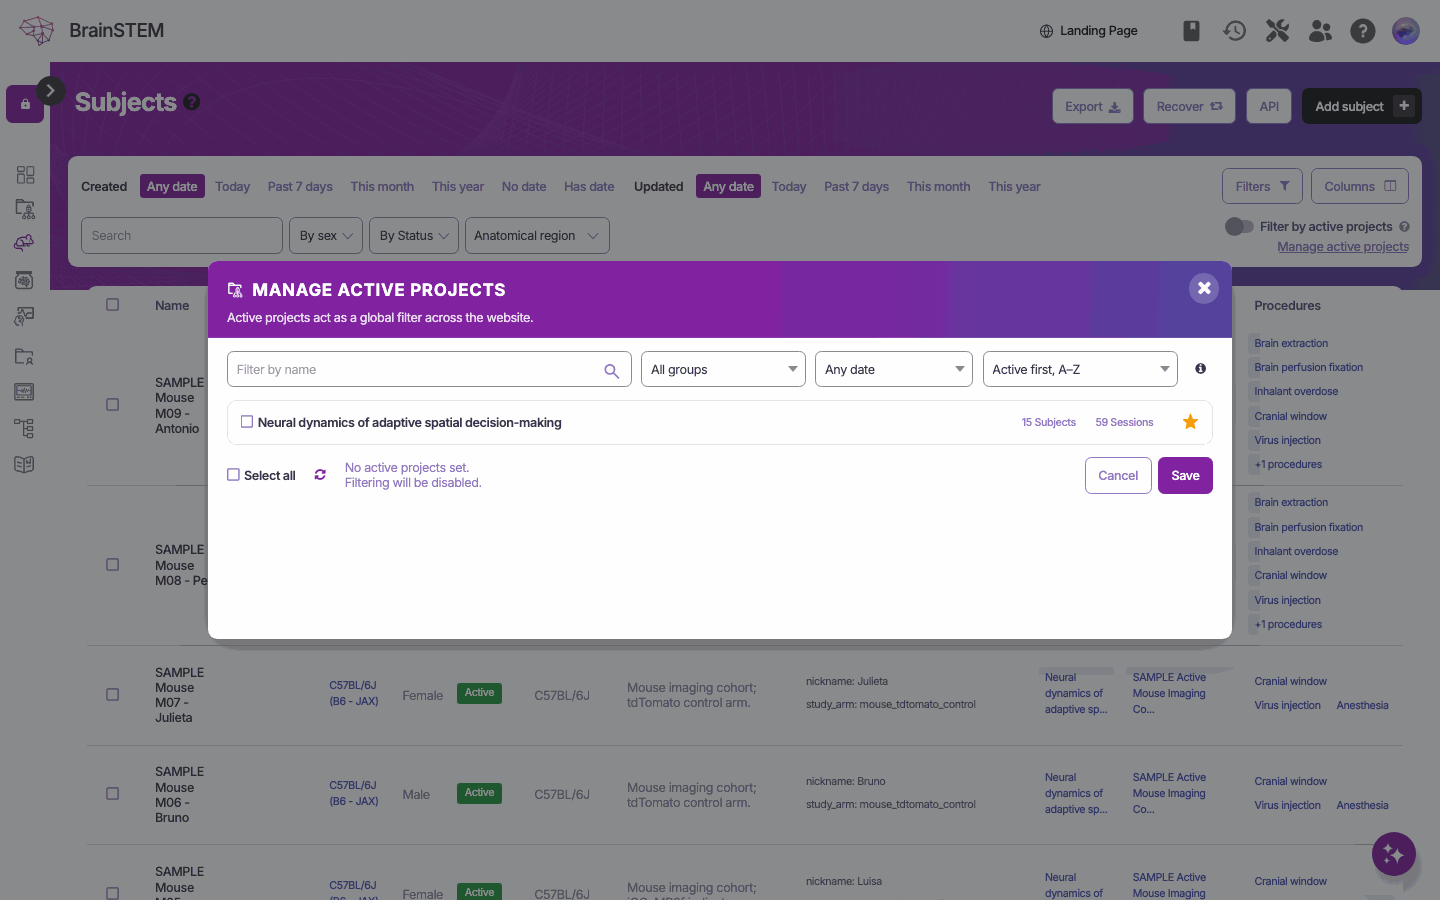
Manage active projects: choose the projects you are working on; lists and selectors can then be narrowed to them.
- When the switch is on, “Only items linked to your active projects are shown. Turn off the filter to show all accessible items.”
- When off, you can “Limit data across BrainSTEM to items linked to projects you mark as active.”
- Turning it on without any active project shows “Select at least one active project before turning filtering on.”
Click Manage active projects to choose the projects. The dialog lists all projects you can read with a Filter by name box, dropdowns for group, creator and creation date, and sort orders such as Active first, A–Z, Most sessions, Most subjects and Permission level. Each project shows its subject and session counts and an icon for your permission level (Contributor, Manager, Owner; no icon means read only). Use Select all, tick the projects and click Save.
The selection is saved to your account and applies on every device. It narrows list views, dashboard widgets, the choices offered in add forms, the recent activity feed and the import tool.
Active projects are a convenience filter, not a permission boundary. You can still open any entry you have access to by its link, others keep their access to your projects, and if the selection matches nothing, everything you can access is shown.
Columns
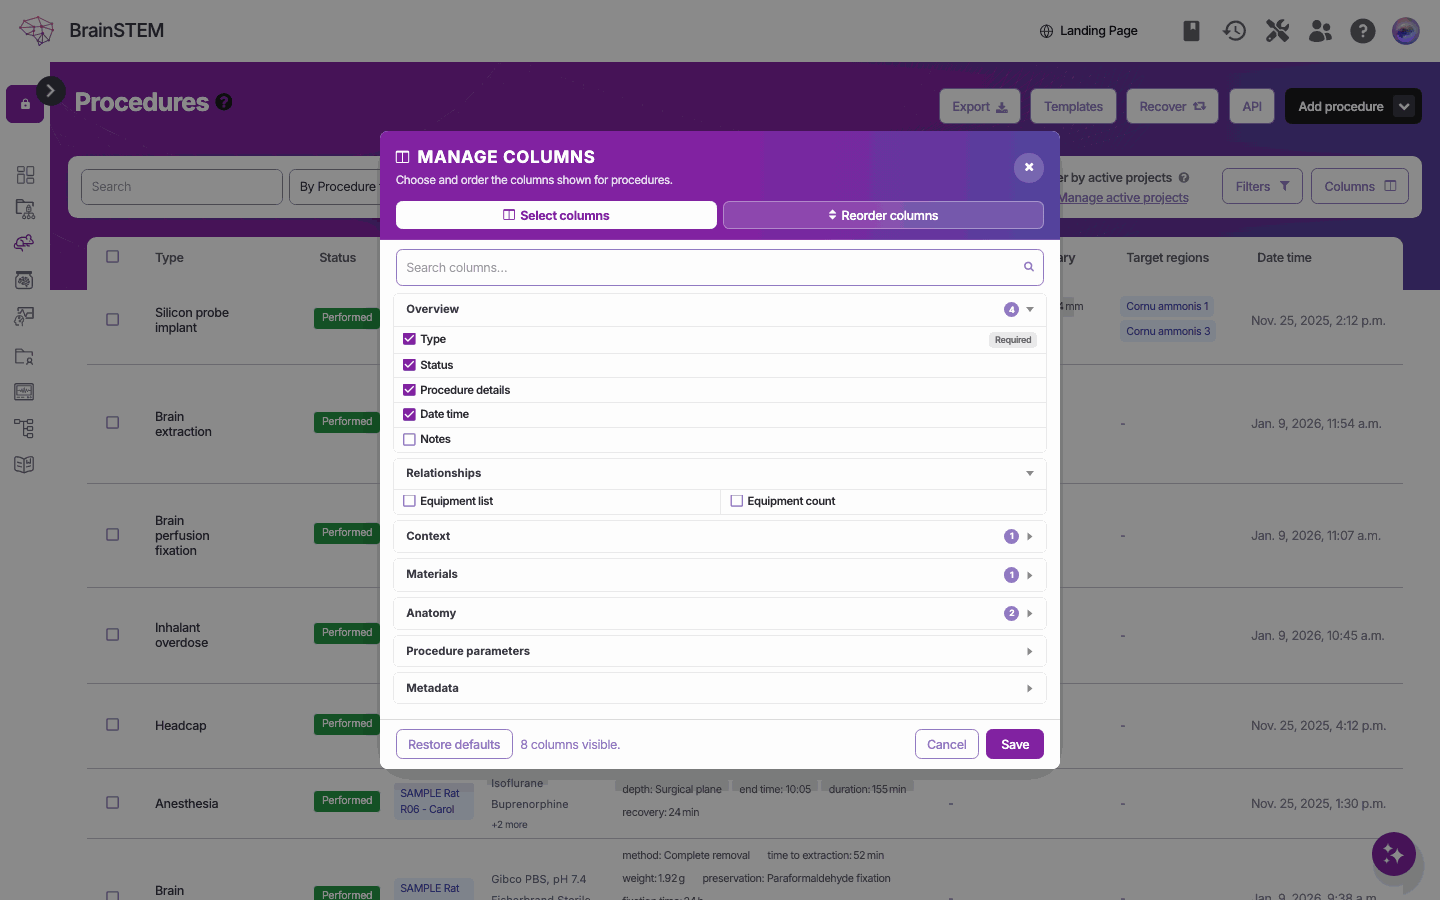
Click Columns to open Manage columns: “Choose and order the columns shown for {entry type, plural}.”
- The Select columns tab lists columns in collapsible groups (Overview, Relationships, domain groups, {Entry type} parameters, Type-specific, Workflow, Access, Metadata). Use Search columns… to find one. Related records appear in pairs: an X list column that shows up to five linked entries (then “+N more”) and an X count column, for example Epochs and Epochs # on sessions.
- The Reorder columns tab lets you drag columns into order or use the move buttons, and hide a column with ✕. The first column is marked Required and cannot be hidden or moved.
- Restore defaults returns to the default columns. Save reloads the list.
Type-specific fields that have a filter are also offered as columns under {Entry type} parameters, for example Shank length on consumables. Values with units show as “value unit”, lists show three items then “+N more”, and empty values show as “—”. On per-type list pages every field of the type is a Type-specific column, shown by default. An Extra fields column shows any extra key: value pairs stored on the entry.
Your column layout is saved per entry type and per portal. Columns added in later releases stay hidden until you add them. There is no limit to the number of columns.
Sorting
Click a column header to sort by that column; click again to reverse the order. Count columns (headers ending in #) sort descending first. The sort order is part of the URL, so it is kept when you share the link.
Pagination
Lists show 50 entries per page with page links at the bottom. The page size cannot be changed. A Show all link appears for shorter result sets; it is disabled for anonymous visitors on the public portal.
Row actions
Hover over a row to reveal its actions: Edit, Quick edit (a popup with the most used fields of sessions, subjects and personal attributes), View only (eye icon, when you cannot change the entry) and a More actions menu with Duplicate, Create template and Delete.
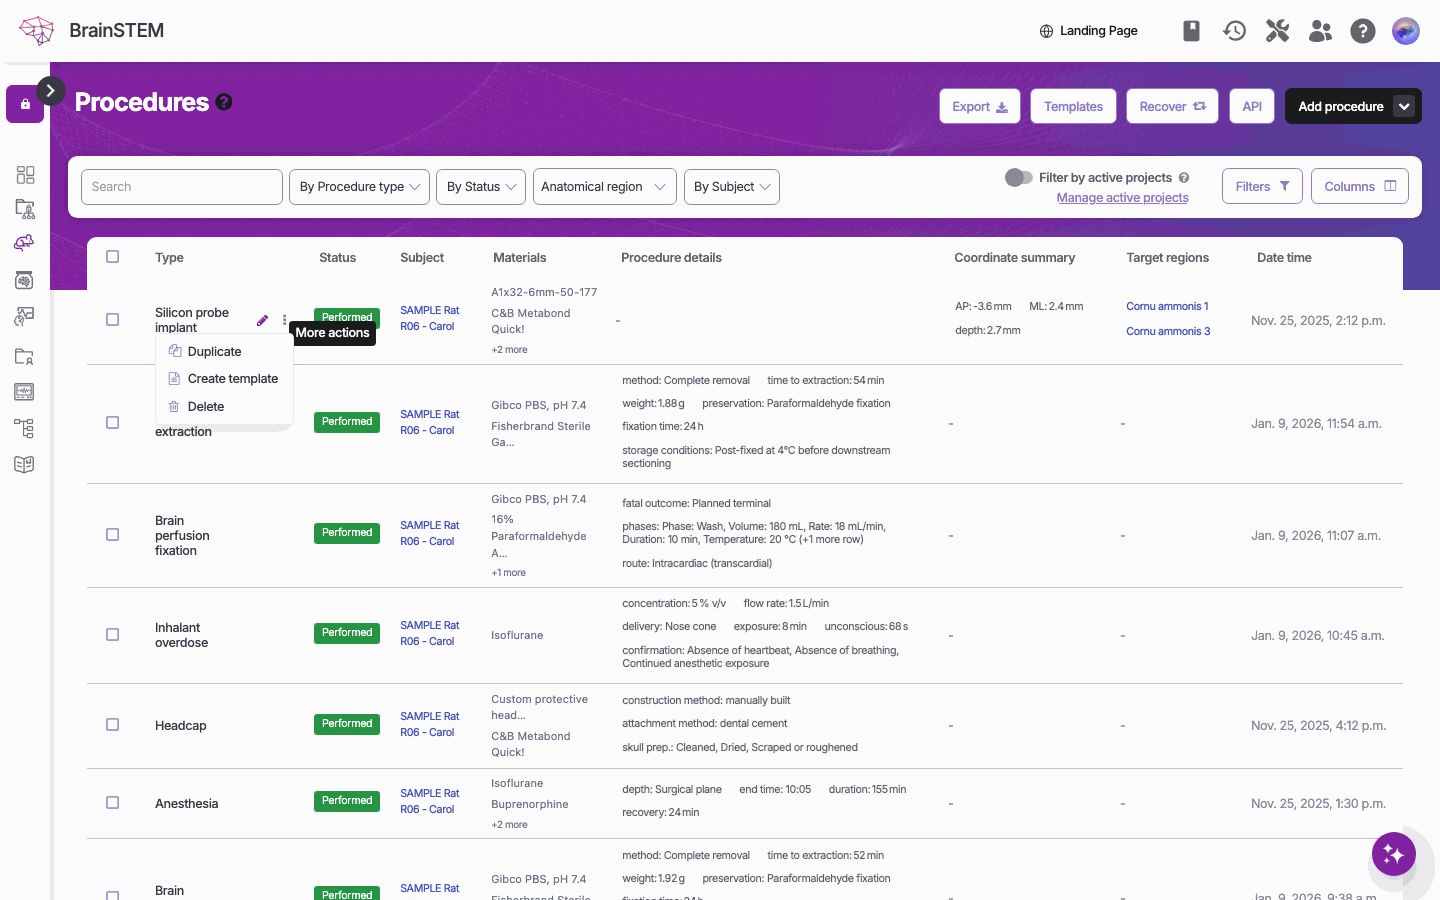
A row’s actions in the procedures list: the pencil opens the form, and More actions offers Duplicate, Create template and Delete.
Hovering over an entry name or a count column shows a summary popup of the entry or the linked entries; subject logs show a small chart.
Bulk actions
Tick the checkboxes of several rows and pick an action from the dropdown (private portal only):
| Action | Available on |
|---|---|
| Export selected entries | Most entry types, see Exports and reports |
| Delete selected items | Most entry types |
| Assign selected sessions to a project / to a collection / to a data storage | Sessions |
| Mark selected planned sessions as performed | Sessions |
| Assign selected subjects to a project / to a cohort | Subjects |
| Enroll selected planned subjects (set active) | Subjects |
| Mark selected planned procedures as performed | Procedures |
| Mark selected planned specimen procedures as performed | Specimen procedures |
| Mark selected planned breedings as started | Breedings |
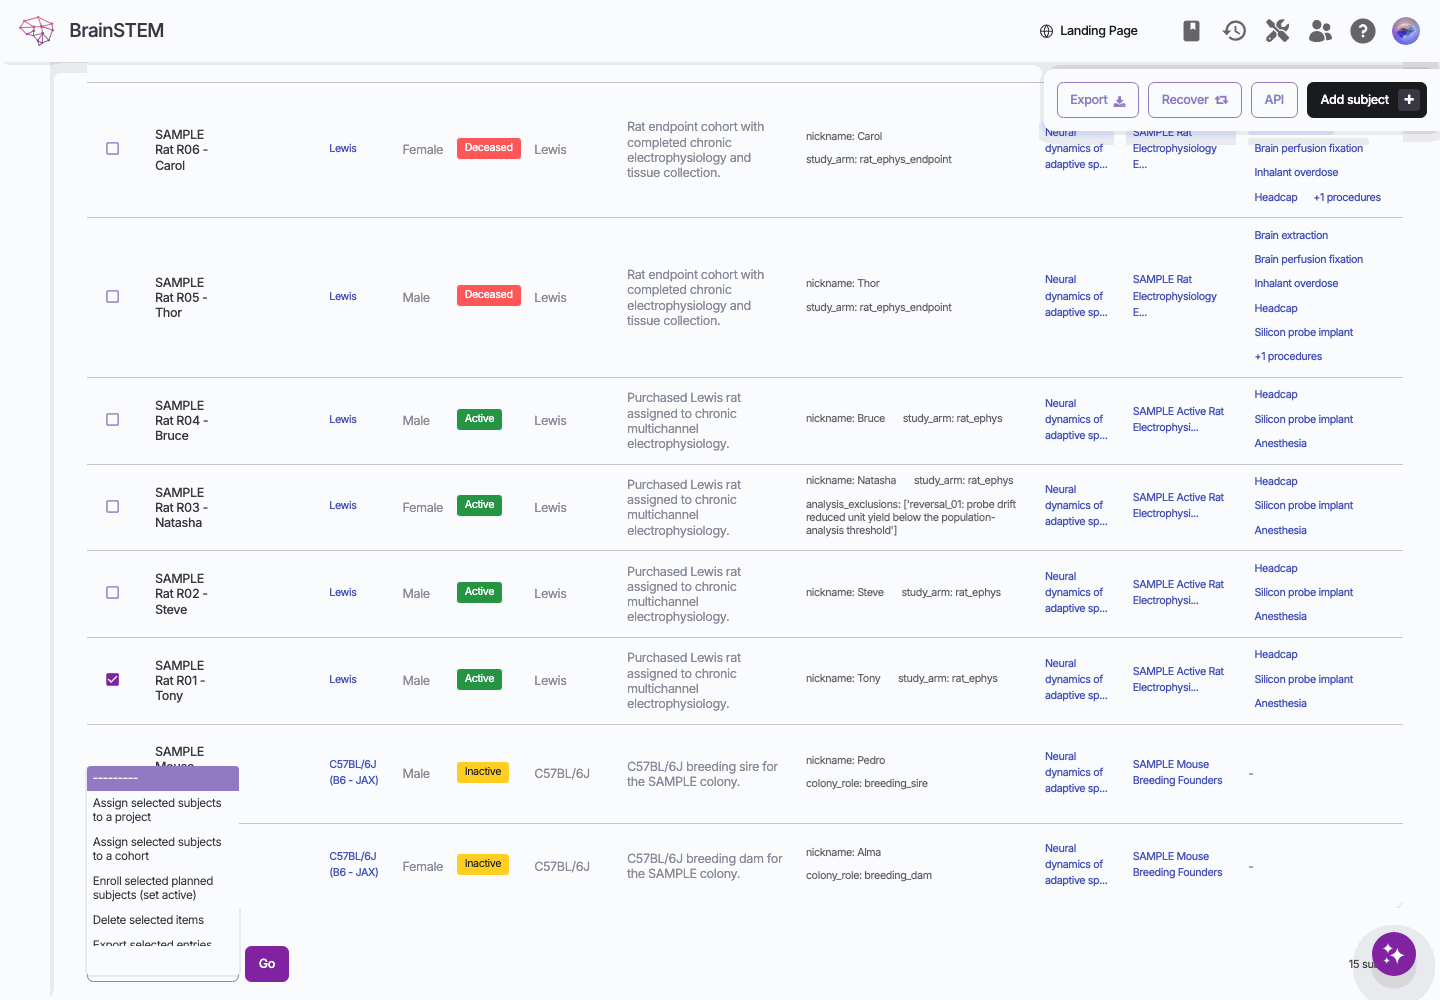
The bulk actions dropdown of the subjects list: assign the selected subjects to a project or a cohort, enroll planned subjects, delete or export the selected entries, then Go.
Delete selected items deletes the ticked entries straight away, without a confirmation page. Entries you may not delete, or that cannot be deleted, are skipped and reported in a message above the list. Deleted entries can be restored from the Recover list, see Deleted entries.
Help icon
The question mark next to the page title opens the help dialog of the entry type: a description, its fields and types, and a Graph tab that shows the entry type with its direct connections. The Open the full data model button leads to the interactive data model.
Recover deleted entries
The Recover button in the toolbar opens the list of deleted entries of that type that you may restore. See Deleted entries.
Related
- Dashboard: the other place the active projects switch lives
- Single entry view: the page a row opens
- Exports and reports: the toolbar Export button and Export selected entries
- Deleted entries: the Recover button and what Delete selected items does
- Anatomical regions: the region trees behind the anatomical region filter
- Permissions: the Member, Contributor, Manager and Owner levels of the Permissions filter